Posted by Maribel Designs 4 U
If you’ve been following along here for a while, you know I have a soft spot for amigurumi that looks good enough to eat. So today I’m sharing one of my favorite designs yet — the Comfort Blush Berry Cupcake! 🧁🍓
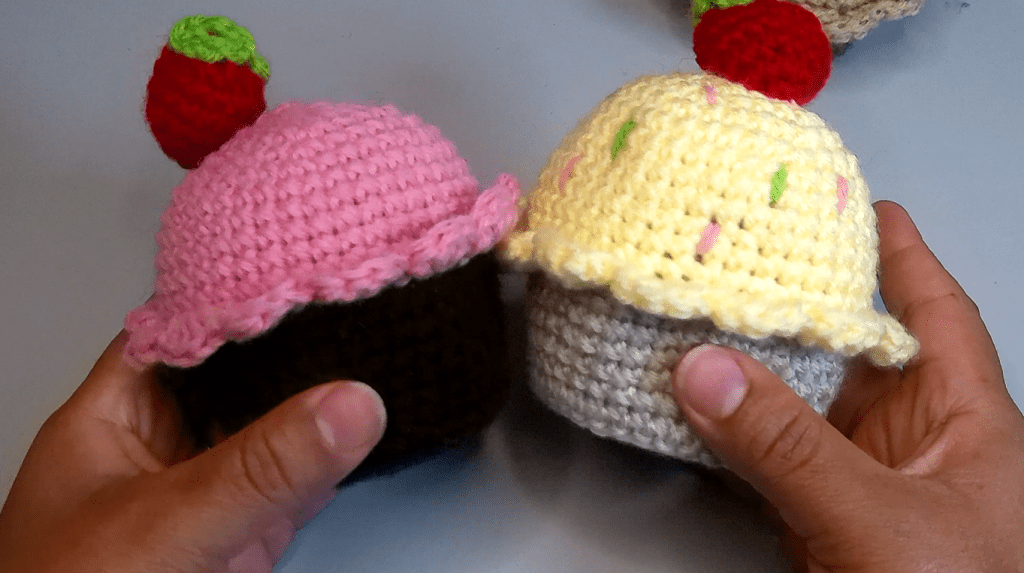
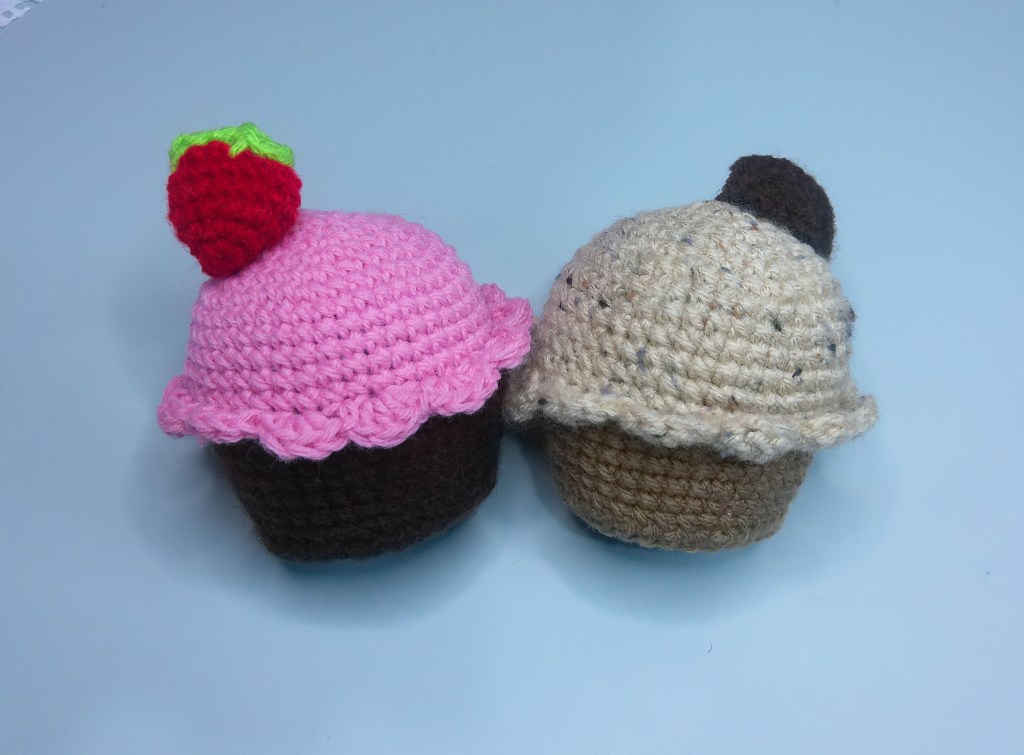
This sweet little pattern features a ruffled icing edge, a classic round cake base, and an optional strawberry topper that honestly steals the show. It works up relatively quickly, makes the most adorable gift, and is a great project if you’ve got a few amigurumi basics under your belt.
Want to see it come to life step by step? I have the full video tutorial on YouTube — watch it here!
And if you’d like a beautifully formatted printable version of this pattern, you can grab the PDF for just $3 — perfect for printing out and keeping in your project binder.
But the full pattern? Completely free, right here. Let’s get into it! 💕
Materials
- Hook: 4.0 mm
- Yarn: 100% Acrylic Worsted Weight in Pink (icing), Brown (cake), Red and Green (strawberry topper), (You can choose your own colors)
- Other: Yarn needle, polyfill stuffing, stitch marker
Skill Level: Intermediate Finished Size: Approximately 3–4 inches tall depending on stuffing
Gauge note: Exact gauge isn’t critical for amigurumi — just keep your tension consistent so there are no gaps in your fabric for stuffing to peek through.
Abbreviations
| Abbreviation | Meaning |
|---|---|
| sc | single crochet |
| inc | increase (2 sc in same stitch) |
| dec | invisible decrease |
| dc | double crochet |
| sl st | slip stitch |
| BLO | back loops only |
| FLO | front loops only |
| MR | magic ring |
| Rnd | round |
| ch | chain |
Designer’s Note
This cupcake is worked in two separate pieces — the cake bottom and the icing top — then sewn together. The ruffled icing edge is created in the final round using a cluster stitch worked in the front loops, which gives it that beautiful frosting swirl look. You can finish it with a strawberry topper, embroidered sprinkles, or even a little embroidered face. Have fun making it your own! 🍓
Part 1: Bottom (Cake)
Work in continuous rounds with Brown yarn. Use a stitch marker to track the beginning of each round.
Rnd 1: MR, 6 sc into magic ring — (6)
Rnd 2: Inc in each st around — (12)
Rnd 3: (sc, inc) × 6 — (18)
Rnd 4: (sc 2, inc) × 6 — (24)
Rnd 5: (sc 3, inc) × 6 — (30)
Rnd 6: (sc 4, inc) × 6 — (36)
Rnd 7: BLO — sc in each st around — (36)
The BLO round creates a clean ridge on the outside of the cake that gives it that classic cupcake liner look!
Rnds 8–9: Sc in each st around (both loops) — (36)
Rnd 10: (sc 5, inc) × 6 — (42)
Rnds 11–12: Sc in each st around — (42)
Fasten off, leaving a long tail.
Base (Bottom of Cake)
Join yarn at the first stitch of the bottom base. Sc evenly around the entire bottom edge for a clean, professional finish. Fasten off and weave in ends.
Part 2: Top (Icing)
Work in continuous rounds with Pink yarn. Do not stuff the icing — it will lay flat against the cake.
Rnd 1: MR, 6 sc into magic ring — (6)
Rnd 2: Inc in each st around — (12)
Rnd 3: (inc, sc) × 6 — (18)
Rnd 4: (inc, sc 2) × 6 — (24)
Rnd 5: (inc, sc 3) × 6 — (30)
Rnd 6: (inc, sc 4) × 6 — (36)
Rnd 7: (inc, sc 5) × 6 — (42)
Rnds 8–13: Sc in each st around — (42)
Rnd 14 — Ruffle Edge: [(FLO, dc × 4 in next st), (sc in both loops in next st)] × 13
This creates the ruffled icing edge! Work your 4 double crochets into the front loop of one stitch, then anchor it down with a regular single crochet into both loops of the next stitch. Repeat 13 times around.
Fasten off, leaving a long tail for sewing. Sew the icing top to the cake bottom, aligning the edges neatly. Weave in all ends.
Optional Add-On: Strawberry Topper
Begin with Red yarn.
Rnd 1: MR, 6 sc into magic ring — (6)
Rnd 2: Inc in each st around — (12)
Rnd 3: (sc, inc) × 6 — (18)
Rnds 4–5: Sc in each st around — (18)
Rnd 6: (sc, dec) × 6 — (12)
Start stuffing here. Gently shape into a teardrop — narrower toward the top.
Rnd 7: Dec × 6 — Switch to Green yarn on the last stitch of this round — (6)
Rnd 8: Sc in each st around — (6)
Rnd 9: (chain 4, sl st in the next st, chain 2, sl st in the next st) × 3
This creates 3 small leaf points. Fasten off green yarn. Sew closed. Sew the strawberry to the top of the icing.
Optional Add-On: Sprinkles
Using 2–4 different colored yarn scraps, embroider short straight stitches scattered across the icing top. Weave in all ends securely. Such a fun finishing touch!
Helpful Tips
- The BLO round on Rnd 7 of the cake is what creates that cupcake liner ridge — don’t skip it!
- For the ruffle edge (Rnd 14), count carefully — you’ll repeat the cluster 13 times around the 42-stitch round.
- Stuff the cake firmly so it holds its shape well. The icing piece is not stuffed.
- Try different color combos — chocolate brown icing on a tan cake, or lavender for a spring version!
- Add safety eyes and a small embroidered smile to give your cupcake a little personality.
Watch the Full Tutorial
New to amigurumi or want to see every stitch worked in real time? Head over to YouTube for the full step-by-step video tutorial!
Want the Printable PDF?
If you’d like a beautifully formatted, print-ready version of this pattern — complete with all the rounds laid out in easy-to-follow tables — grab the Printable PDF for just $[price]!
I’d absolutely love to see your finished cupcakes! If you make this pattern, tag me on Instagram or leave a photo in the comments below. There is nothing that makes my day more than seeing your beautiful makes. 🧶💕
Happy crocheting! — Maribel
© Maribel Designs 4 U. This pattern is for personal use only. Please do not redistribute or sell this pattern. You are welcome to sell finished items made from this pattern — just give credit back to Maribel Designs 4 U!
